Explore 30+ kitchen island ideas for every style and budget. Get expert tips on layouts, seating, materials, storage, and costs to plan your perfect kitchen. A kitchen island can transform how you cook, eat, and live in your home. It’s no longer just an extra counter — it’s where breakfast happens, homework gets done, and guests naturally gather. Yet with so many styles, shapes, materials, and configurations to choose from, picking the right island can feel overwhelming.
This guide covers everything: how to choose the right layout for your space, which countertop materials hold up best, how to add seating without crowding the room, and what the whole project actually costs. Whether you’re starting a full renovation or just planning ahead, you’ll find the practical guidance you need here.
What Is a Kitchen Island? (Definition)
A kitchen island is a freestanding or built-in counter unit positioned in the center of a kitchen, separate from the perimeter cabinetry. Unlike a peninsula (which is attached to a wall on one end), an island has clearance on all sides, creating a fully accessible workspace.
Islands can serve as extra prep space, a cooking zone, a dining area, a storage hub, or all of the above — often within the same unit.
How to Know If Your Kitchen Can Fit an Island
Before exploring styles and materials, confirm that your kitchen’s floor plan can physically accommodate an island. Rushing past this step is one of the most common and expensive mistakes homeowners make.
Minimum Clearance Requirements
Kitchen designers and building codes generally recommend:
- 42 inches of clearance on all sides for a single-cook kitchen
- 48 inches minimum for kitchens used by multiple people simultaneously
- 36 inches as an absolute minimum in very compact layouts (not recommended if you frequently cook with others)
These clearances ensure safe movement around open oven doors, refrigerator doors, and dishwasher doors. If your kitchen can’t provide at least 36 inches on the working sides, consider a rolling cart or a narrow prep table instead of a permanent island.
Minimum Island Size
The smallest practical permanent island is about 2 feet wide by 4 feet long (24″ × 48″). Anything smaller functions better as a cart. For comfortable seating overhang, you need at least 12 inches of knee clearance — which adds to the footprint.
How to Measure Your Space
- Measure the full length and width of the kitchen floor.
- Mark the existing cabinet footprint on a scale drawing.
- Test different island dimensions, keeping clearances in mind.
- Account for the work triangle: your island shouldn’t interrupt the path between the sink, refrigerator, and range.
Kitchen Island Layouts: Which Shape Works for Your Kitchen?
The shape of your island should follow the shape of your kitchen, not the other way around.
Rectangular Islands
The most common configuration. Works in almost every kitchen over 200 square feet. Easy to add seating on one long side. Best for L-shaped, U-shaped, and open-plan kitchens.
Square Islands
Ideal for large square kitchens. Seating can wrap on two or three sides. Requires significant floor space and wider clearances all around.
Galley-Style Kitchens: Skip the Island?
In a true galley kitchen (two parallel runs of cabinets with a corridor in between), a permanent island usually isn’t feasible. A rolling prep cart or a fold-down peninsula works better.
L-Shaped Islands
A less common option that works well in very open floor plans. The L-shape provides natural zone separation: one arm for prep, another for seating or serving.
Curved and Angled Islands
Curves soften large, boxy kitchens and work well in contemporary or transitional designs. They’re more expensive to build and harder to seat effectively, but they can define a kitchen’s entire aesthetic.
Kitchen Island Ideas by Style, Function, and Material
Storage-Focused Kitchen Islands
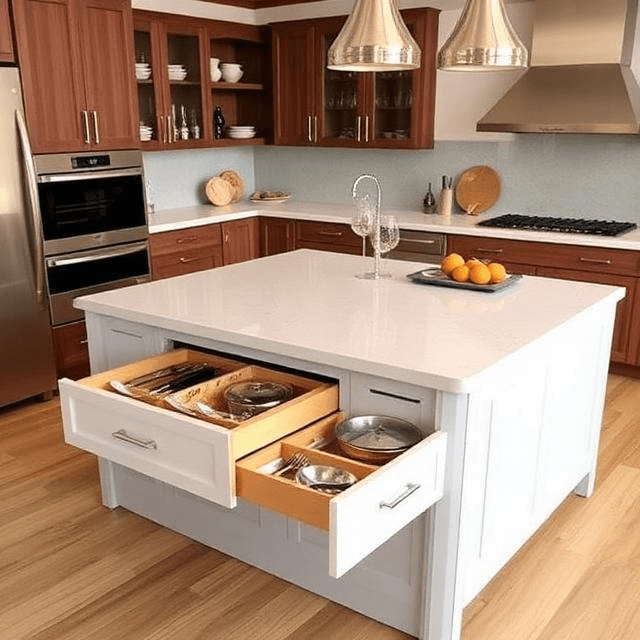
Deep Drawer Islands
Purpose-built storage islands replace upper cabinetry with deeper, more accessible storage at counter height. Drawers with built-in organizers keep pots, pans, utensils, and small appliances off the counter.
Best for: Families with high daily kitchen traffic; homeowners who want a minimal, clutter-free look.
Design tip: Use full-extension, soft-close drawer hardware — it makes a dramatic difference in daily usability and perceived quality.
Hidden Trash and Recycling Pullouts
A well-planned island includes a dedicated pullout for trash, recycling, and composting. These can be tucked beneath the sink area or built into a dedicated base cabinet on the island. This keeps waste management central to the cleanup zone rather than hidden in a corner.
Pantry-Style Island Cabinets
Some islands incorporate tall pantry-cabinet style sections on one end, complete with shelving and a door. This works especially well in open kitchens where upper wall cabinets are limited.
Kitchen Islands with Seating
Seating at the island turns a workspace into a gathering place. The key is getting the geometry right.
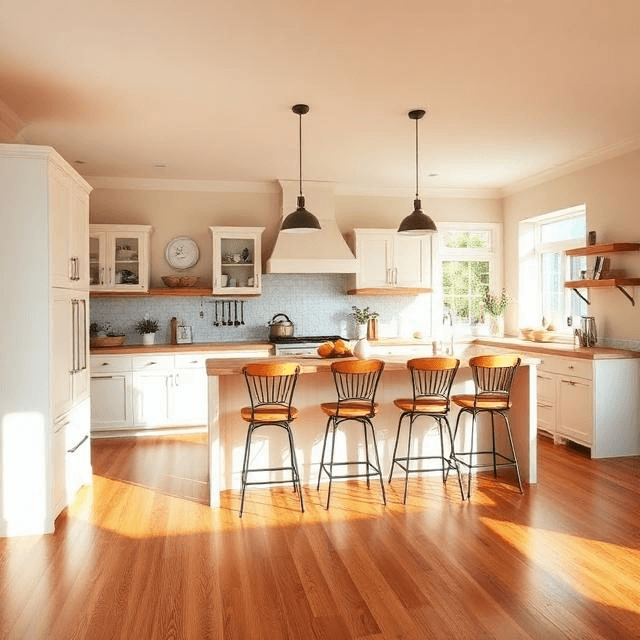
Bar Stool Heights: A Quick Reference
| Seating Type | Seat Height | Counter Height | Overhang Needed |
|---|---|---|---|
| Bar stools | 28–30 in | 42–45 in (bar height) | 12–15 in |
| Counter stools | 24–26 in | 36 in (standard counter) | 12 in |
| Chair height | 18 in | 30 in (table height) | 12–15 in |
Most kitchen islands are built at standard counter height (36 inches). If you want bar-height seating, you need to raise the island surface or add a raised overhang section.
Overhang Seating: The Invisible Design Problem
Many homeowners request an island with seating but forget to account for knee clearance. A standard countertop overhang of 12 inches is the minimum for comfort; 15–18 inches is better if you plan to sit and eat meals rather than just perch briefly. Without this, stools are uncomfortable and legs collide with the island base.
Built-In Bench Seating
A built-in bench along one side of the island — like a banquette — creates a more permanent, furniture-like feel. This works especially well in open kitchens with adjacent dining areas, creating a visual and functional anchor for the space.
Leather and Upholstered Stools
Leather and performance-fabric upholstered stools add texture and warmth. They’re more comfortable for extended sitting but require more maintenance. Look for stools with easy-clean materials if you have young children.
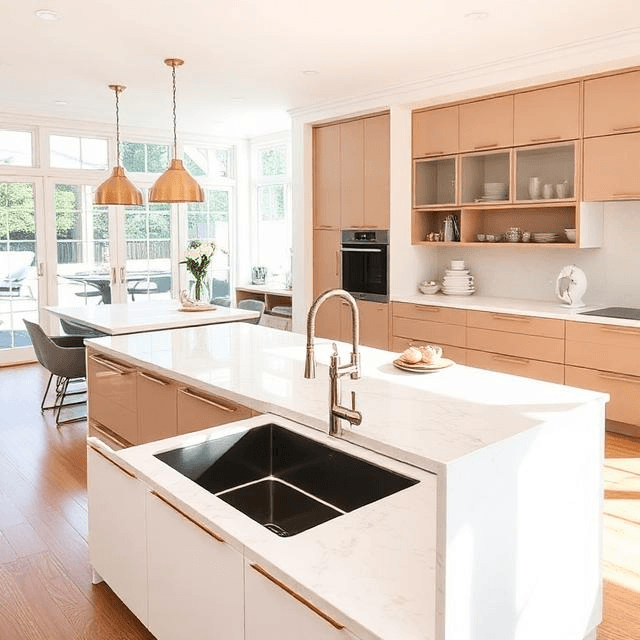
Kitchen Islands with Sinks
Installing a sink in the island is one of the most functional upgrades available — and one of the most complex to execute.
Pros of an Island Sink
- Creates a second cleanup zone for entertaining
- Keeps prep separate from cooking
- Allows the island cook to face guests
- Frees up the perimeter sink for a larger window view
Cons of an Island Sink
- Requires plumbing rough-in through the floor slab or subfloor
- Adds $1,500–$4,000+ to project costs
- Garbage disposal venting can be tricky
- Reduces available storage in the island base
What to Plan For
The sink location needs to be decided before framing, rough plumbing, and flooring installation. Moving it afterward is a significant expense. Pair the island sink with an undermount design and a quartz or solid surface countertop for easiest cleaning.
Kitchen Islands with Cooktops or Ranges
Cooking on an island makes you part of the action — you face the room rather than the wall. But it introduces a ventilation challenge that needs careful planning.
Ventilation Requirements
An island cooktop requires a ceiling-mounted range hood (also called an island hood or chimney hood) or a downdraft ventilation system. Ceiling hoods must be sized to match the cooktop’s BTU output. A general rule: the hood should extend 3 inches beyond the cooktop on all sides and be rated for at least 600 CFM for gas cooktops.
Downdraft systems are less obtrusive but also less effective for high-heat cooking. They’re a reasonable compromise in kitchens where ceiling ventilation is impractical.
Safety Clearances
Maintain at least 30 inches (electric/induction) or 36 inches (gas) between the cooktop surface and the bottom of the range hood above it, per most manufacturer guidelines and local building codes.
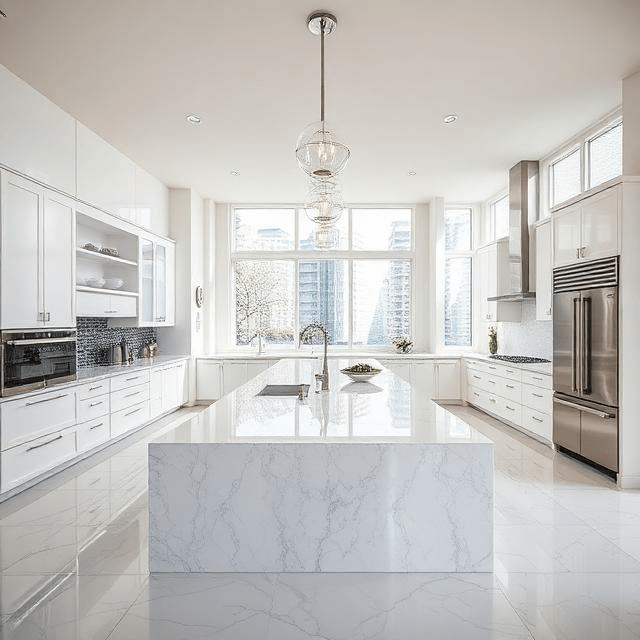
Kitchen Islands with Waterfall Countertops
A waterfall countertop continues the island’s surface material down the sides, creating a sleek, furniture-like profile. This has been a dominant design trend for over a decade and remains popular in contemporary and transitional kitchens.
Best materials for waterfall edges: Quartz (easiest matching due to consistent patterning), marble and marble-look porcelain slabs, and butcher block.
Cost impact: Waterfall edges typically add 20–40% to countertop costs because of additional material and precision mitered edge work.
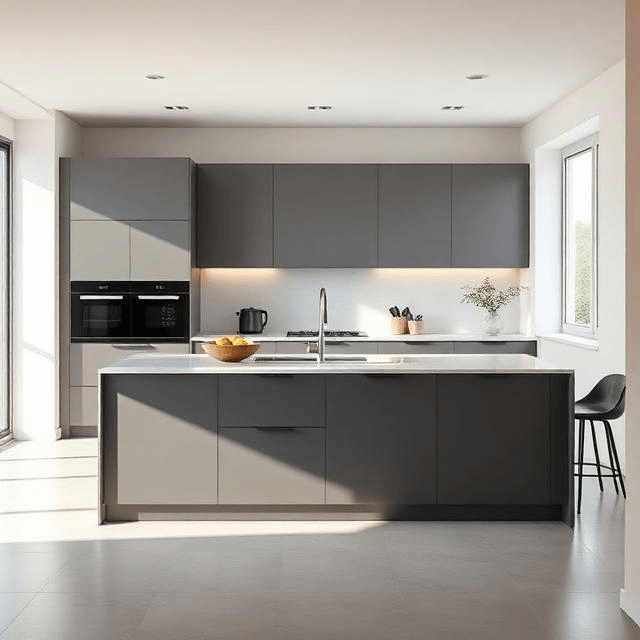
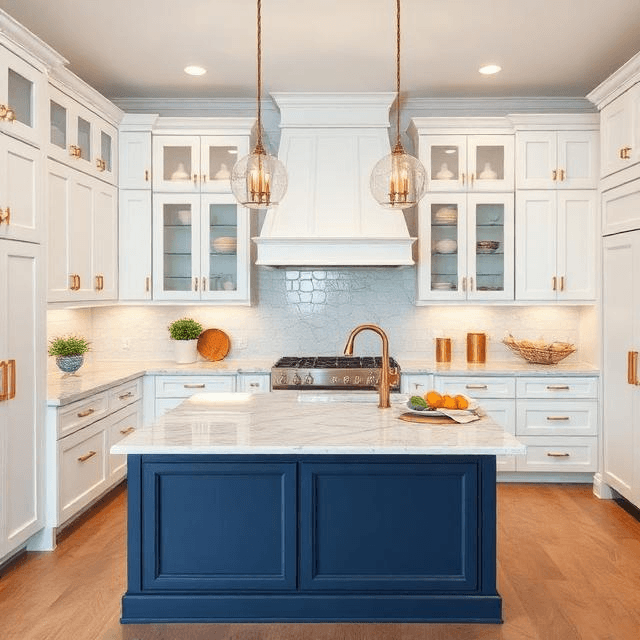
Two-Tone Kitchen Islands
Two-tone kitchens — where the island is a different color or finish than the perimeter cabinetry — have become one of the most durable design trends in modern kitchen design. A classic combination is white or light perimeter cabinets with a deep navy, forest green, charcoal, or black island.
Why it works: The island reads as furniture, not built-in cabinetry, giving the kitchen a collected, layered feel. It also allows for a bolder color choice without overwhelming the room.
Common combinations:
- White perimeter + navy island
- Light wood + matte black island
- Shaker white + sage green island
- Two-tone gray: light upper cabinets, darker base island
Rolling and Freestanding Kitchen Islands
Not every kitchen needs a permanent built-in island. A freestanding or rolling island offers flexibility and can work in rental apartments, smaller kitchens, and households where space needs change over time.
Benefits:
- No construction required
- Can be moved for cleaning, events, or layout changes
- Lower cost: quality freestanding islands range from $300–$3,000
- Pairs well with older homes that have character cabinetry
Limitations:
- No built-in plumbing or electrical
- Less storage than a custom-built island
- Can feel visually lightweight in a large, open kitchen
Kitchen Islands with Open Shelving
Open shelving on one or two sides of an island creates display space for cookbooks, serving pieces, and decorative objects. It lightens the visual weight of a large island and makes the space feel more accessible.
Practical consideration: Open shelves in the kitchen accumulate grease and dust faster than closed cabinets. Keep them for items you use frequently (at least weekly) so they stay clean without constant effort.
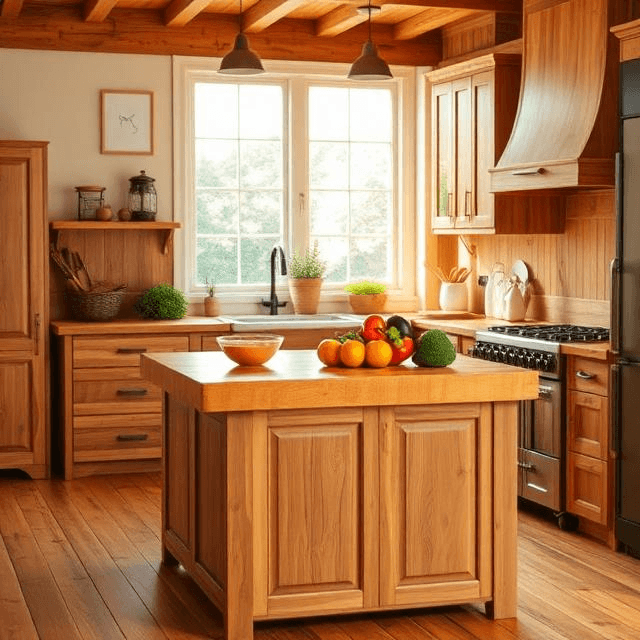
Butcher Block Kitchen Islands
Butcher block countertops — typically made from end-grain or face-grain maple, walnut, or cherry — bring warmth and a natural, artisanal quality to the kitchen island. They’re a popular choice for islands specifically because they function as an actual cutting surface.
Maintenance: Butcher block requires regular oiling (mineral oil or food-safe oil, monthly or as needed), immediate cleanup of standing water, and occasional light sanding to remove stains or marks.
Best use case: A butcher block top on just the island, with a different material (quartz, marble) on the perimeter. This is both practical and visually interesting.
Minimalist and Handleless Kitchen Islands
Handleless cabinets — using touch-latch or push-to-open systems, or integrated J-pull handles — create a clean, seamless look. This style suits contemporary, Scandinavian, and Japanese-inspired kitchens. It’s a particularly good choice for islands with waterfall edges, where hardware would interrupt the smooth profile.
Farmhouse and Shaker-Style Islands
For traditional, transitional, or farmhouse kitchens, a Shaker-style island with raised-panel or inset doors, vintage-inspired bin pulls or cup handles, and a painted finish (often white, off-white, or a muted color) is the most cohesive choice.
Popular finishes: Antique white, linen, sage, slate blue, black (as a two-tone accent).
Kitchen Island Materials: A Complete Comparison
Countertop Materials
| Material | Durability | Heat Resistance | Maintenance | Avg. Cost/sq ft |
|---|---|---|---|---|
| Quartz (engineered) | Excellent | Moderate | Low | $70–$150 |
| Granite (natural stone) | Excellent | Excellent | Low–Moderate | $60–$150 |
| Marble (natural stone) | Moderate | Good | High | $75–$250 |
| Porcelain slab | Excellent | Excellent | Low | $65–$120 |
| Butcher block (wood) | Moderate | Poor | High | $40–$100 |
| Concrete | Good | Excellent | Moderate | $75–$150 |
| Quartzite | Excellent | Good | Moderate | $60–$120 |
| Soapstone | Good | Excellent | Low | $70–$120 |
Cabinet/Base Materials
The island base is typically constructed from the same cabinet materials as the perimeter:
- Plywood box construction (preferred): strong, stable, holds screws well
- MDF (medium-density fiberboard): smooth finish, good for painted cabinets, less moisture-resistant
- Particleboard: budget option, not recommended for islands near sinks
Finish Options
- Painted (most popular): flexible color choice, can be repainted
- Stained wood: warm, natural look; shows wear over time
- Veneer: wood appearance with more stability than solid wood
- Laminate: durable and budget-friendly, variety of finishes available
Kitchen Island Lighting Ideas
Lighting over the island is both functional and decorative — it’s one of the most visible design choices in the kitchen.
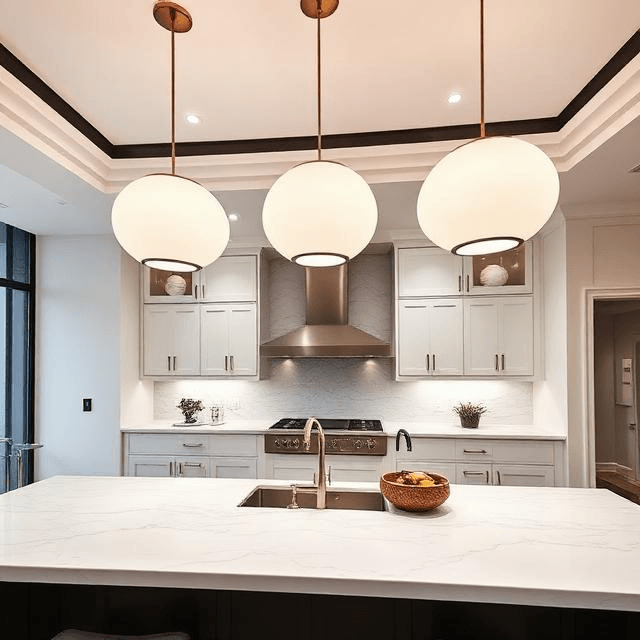
Pendant Lights
Pendant lights are the most popular island lighting choice. The general rule for sizing:
- Two pendants for islands up to 4 feet long
- Three pendants for islands 5–7 feet
- Linear pendant or four lights for islands over 7 feet
Space pendants evenly, leave 6–12 inches from each end of the island, and hang them 30–36 inches above the countertop surface (72 inches from the floor is a common benchmark).
Recessed Lighting
Recessed can lights in the ceiling above the island provide general task lighting. Combine them with pendants: pendants add ambiance and define the zone, while recessed lighting provides adequate work illumination.
Linear Suspension Lights
A single long linear pendant over a rectangular island creates a strong, clean visual statement. Particularly well-suited to modern and contemporary kitchens.
Kitchen Island Cost: What to Budget
Cost varies enormously based on size, materials, whether plumbing or electrical is involved, and local labor rates.
Cost Breakdown
| Component | Budget Range |
|---|---|
| Freestanding/rolling island | $300–$3,000 |
| Basic built-in island (no plumbing/electrical) | $3,000–$8,000 |
| Mid-range built-in island | $8,000–$15,000 |
| High-end custom island | $15,000–$40,000+ |
| Adding a sink to an existing island | $1,500–$4,000+ |
| Adding a cooktop | $2,000–$6,000+ |
| Adding electrical outlets | $500–$1,500 |
What Drives Costs Up
- Custom cabinet construction (vs. stock or semi-custom)
- Premium countertop materials (marble, quartzite, high-end quartz)
- Waterfall edges (25–40% countertop cost increase)
- Island plumbing (requires licensed plumber, potential slab work)
- Integrated appliances (refrigerator drawers, warming drawers, dishwasher)
- Specialty finishes (fluted panel, bespoke paint)
Electrical and Plumbing Considerations
Outlets in the Island
The National Electrical Code (NEC) requires electrical outlets for kitchen islands larger than 12 inches in one dimension. For islands over 24 inches by 48 inches, two outlets are required on the countertop level. Pop-up outlets or recessed USB outlets are popular choices that keep the surface clean.
Under-Island Refrigerator Drawers
Refrigerator drawers built into the island base are a growing trend, particularly in larger or entertaining-focused kitchens. They keep drinks, produce, and prep ingredients accessible at the cooking zone without trips to the main refrigerator.
Under-Island Wine or Beverage Centers
A wine cooler or beverage center in the island base functions as a secondary refrigeration zone. This requires a dedicated 20-amp electrical circuit in the island.
Common Kitchen Island Mistakes (And How to Avoid Them)
- Too small for the space: An undersized island looks awkward and provides little practical benefit. Size up before you finalize.
- Insufficient clearance: Blocking oven and dishwasher door swing is a major functional problem. Walk through every scenario.
- Forgetting ventilation for a cooktop: This is an expensive fix after the fact. Plan ductwork before construction.
- No knee clearance for seating: A 12-inch minimum overhang is non-negotiable for functional seating.
- Matching the island exactly to perimeter cabinets: A perfectly matched island can look like a furniture-store catalog. Some contrast — even subtle — adds depth.
- Ignoring the work triangle: An island that interrupts the path between sink, range, and refrigerator creates daily frustration.
- Skipping the pop-up outlet: You’ll want power for small appliances. Plan for it during construction.
Kitchen Island Trends
Based on current design industry data and renovation project activity:
- Fluted and ribbed cabinet fronts on island bases: adding texture without hardware
- Unlacquered brass and aged bronze hardware: replacing polished chrome and matte black
- Slab-front handleless islands in bold colors (deep teal, terracotta, forest green)
- Integrated charging stations with wireless charging pads and USB-A/C ports built into the surface
- Mixed material countertops: one end of the island in butcher block, the other in stone
- Statement range hoods over islands: architectural, sculptural hoods as focal points
- Burl wood accents: burl veneer panels on island ends
- Oversized islands in open plans: as homes embrace open layouts, islands grow to define and anchor the social space
Maintenance and Care by Material
Quartz Countertops
Wipe with mild dish soap and warm water. Avoid bleach-based cleaners. Despite marketing, quartz is not fully heat-proof — use trivets. No sealing required.
Granite and Natural Stone
Seal annually with a stone sealer. Clean with pH-neutral stone cleaner. Avoid acidic cleaners (vinegar, lemon juice).
Butcher Block
Oil monthly with food-safe mineral oil. Clean promptly after cutting raw meat. Re-sand lightly every few years to refresh. Avoid soaking with water.
Painted Cabinets
Clean with mild soap and a soft cloth. Avoid abrasive scrubbers. Touch up chips quickly to prevent peeling. High-quality paints (Benjamin Moore Advance, Sherwin-Williams Emerald Urethane) hold up significantly better than standard interior paint.
FAQ: Kitchen Island Ideas
Q: What is the ideal size for a kitchen island?
A: The most functional kitchen islands are between 4 and 6 feet long and 2 to 3 feet wide. You need at least 42 inches of clearance on all sides for comfortable movement.
Q: How much does it cost to add a kitchen island?
A: A basic built-in island with no plumbing or electrical starts around $3,000–$8,000. A full custom island with a sink, cooktop, and premium countertop can reach $25,000–$40,000+. Freestanding islands cost $300–$3,000.
Q: What countertop material is best for a kitchen island?
A: Quartz is the most popular for its balance of durability, low maintenance, and consistent appearance. Granite is excellent for heat resistance. Butcher block is ideal if you want a cutting surface but requires more upkeep.
Q: Can I add a sink to an existing island?
A: Yes, but it requires licensed plumbing work, including running supply and drain lines through the floor. Budget $1,500–$4,000+ for the plumbing alone, not counting the sink and countertop modifications.
Q: What is the standard height for a kitchen island?
A: Standard counter height is 36 inches, which pairs with 24–26 inch counter stools. Bar height is 42–45 inches, which pairs with 28–30 inch bar stools. Table height (30 inches) allows for dining chairs.
Q: How many pendant lights do I need over my island?
A: Two pendants for islands up to 4 feet, three for 5–7 feet, and a linear pendant or four lights for longer islands. Hang them 30–36 inches above the countertop.
Q: What is a waterfall countertop on a kitchen island?
A: A waterfall countertop extends the surface material vertically down the sides of the island to the floor, creating a continuous, furniture-like profile. It adds 20–40% to countertop costs and works best with quartz, marble, or porcelain slabs.
Q: Can a small kitchen have an island?
A: Yes, but only with very careful planning. The kitchen must provide at least 36 inches (ideally 42 inches) of clearance on working sides. A rolling cart or 2×4-foot stationary island may be the only realistic options in compact spaces.
Q: What is a two-tone kitchen island?
A: A two-tone kitchen features an island in a different color or finish than the surrounding cabinetry. It’s a popular design strategy that makes the island look more like furniture and allows for bolder color choices.
Q: Should my island be the same height as my counters?
A: Not necessarily. Many kitchens incorporate a raised bar-height section on one end of the island for seating while keeping the main surface at standard counter height for prep. This multi-level approach is one of the most functional configurations.
Q: How do I ventilate a cooktop on an island?
A: Island cooktops need a ceiling-mounted range hood (chimney or island hood) rated at a minimum of 600 CFM for gas cooktops, or a downdraft ventilation system. Plan ductwork routing before construction.
Q: What is the best seating overhang for a kitchen island?
A: A minimum of 12 inches for basic knee clearance; 15–18 inches for comfortable dining. This overhang is built into the countertop design and must be planned before fabrication.
Q: Are open shelves on a kitchen island practical?
A: Yes, for frequently used items. Open shelves accumulate grease and dust more quickly than closed cabinets, so they work best for cookbooks, everyday serving pieces, and decorative objects you reach for regularly.
Q: What’s the difference between a kitchen island and a peninsula?
A: An island is freestanding with clearance on all four sides. A peninsula is connected to the wall or cabinetry on one end, creating a U or G-shaped kitchen. Peninsulas require less floor space but offer less accessibility.
Q: How do I add electrical outlets to a kitchen island?
A: The NEC requires outlets on islands larger than 12 inches in one dimension. A licensed electrician runs wiring through the floor to the island base. Pop-up outlets and recessed USB/outlet combos are popular for keeping the surface uncluttered.
Comparison Table: Kitchen Island Types at a Glance
| Island Type | Best For | Avg. Cost | Plumbing Needed | Seating Possible |
|---|---|---|---|---|
| Freestanding/rolling cart | Small kitchens, renters | $300–$3,000 | No | Sometimes |
| Basic built-in | Most renovations | $3,000–$10,000 | No | Yes |
| Built-in with sink | Entertaining, open kitchens | $6,000–$20,000 | Yes | Yes |
| Built-in with cooktop | Cooking-focused kitchens | $8,000–$25,000 | No (electrical needed) | Limited |
| Custom waterfall island | High-end remodels | $15,000–$40,000+ | Optional | Yes |
| Two-tone statement island | Design-forward renovations | $8,000–$20,000 | Optional | Yes |