
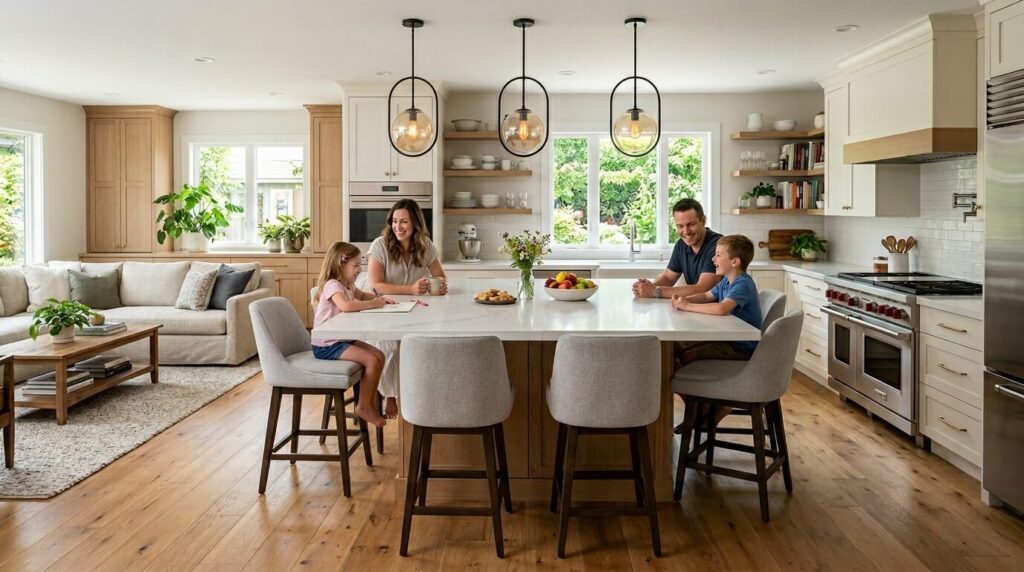
Explore 30+ kitchen island designs—from layouts and materials to seating, storage, and cost. The most complete guide to planning your perfect kitchen island. A kitchen island is no longer just a bonus work surface. In modern homes, it anchors the entire kitchen—organizing traffic flow, housing appliances, feeding families, and creating the casual social hub that so many kitchens used to lack.
Yet the decisions involved can feel overwhelming. Should your island be permanent or movable? What countertop material holds up to daily abuse? How wide should the clearance be? And which design actually matches both your kitchen size and your lifestyle?
This guide answers all of it. Whether you’re planning a full remodel or simply upgrading an existing island, you’ll find detailed information on every design direction, material choice, layout rule, and trend shaping kitchen island designs in 2026.
What Is a Kitchen Island? (Definition and Purpose)
A kitchen island is a freestanding or built-in counter unit positioned within the open floor space of a kitchen, separate from the perimeter cabinetry. It is accessible from multiple sides and typically serves several functions at once: food preparation, storage, cooking, dining, and socializing.
Unlike a kitchen peninsula—which is attached to a wall or cabinet run on one end—a true island is surrounded by open space on all sides, usually requiring at least 36–48 inches of clearance on each walkable side.
Key Functions of a Kitchen Island
- Prep surface: Extra counter space for chopping, mixing, and plating
- Storage hub: Drawers, cabinets, open shelving, and pull-outs below the countertop
- Cooking station: Can house a cooktop, prep sink, or undercounter appliances
- Dining area: Seating for 2–6 people with an overhang for stools or chairs
- Social anchor: The place guests gather while the cook works
- Organizational center: Charging stations, mail zones, homework spots
Types of Kitchen Island Designs
1. Fixed/Built-In Kitchen Islands
A built-in island is permanently installed, tied into the kitchen’s plumbing and/or electrical system. It’s the most popular choice for renovations because it can be fully customized—matching cabinetry, countertop materials, hardware, and finishes throughout.
Best for: Homeowners doing a full kitchen remodel with a defined layout.
Pros:
- Fully customizable to any size or shape
- Can integrate sinks, cooktops, and appliances
- Adds permanent value to the home
- Storage can be maximized on all four sides
Cons:
- Requires professional installation
- Not movable if your needs change
- Higher upfront cost ($3,000–$15,000+)
2. Freestanding / Portable Kitchen Islands
A freestanding island sits on the floor without attachment to cabinetry or plumbing. Many have locking casters for mobility. They’re ideal for renters, smaller kitchens, or homeowners who want flexibility.
Best for: Renters, smaller kitchens, phased renovation plans.
Pros:
- Can be repositioned or removed
- Lower cost ($300–$2,500 for ready-made units)
- No contractor required
- Available in many styles at IKEA, Home Depot, Wayfair, and Williams-Sonoma
Cons:
- Cannot house plumbing or complex electrical
- Limited storage compared to built-in
- May look less integrated with surrounding cabinets
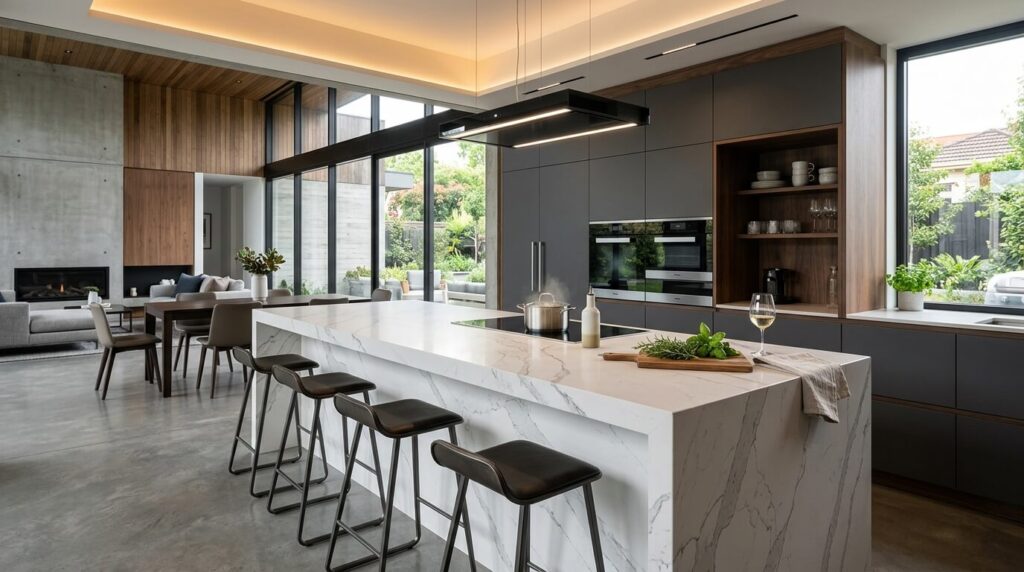
3. Waterfall Edge Kitchen Islands
A waterfall island features the countertop material cascading vertically down one or both sides, all the way to the floor. The result is a sleek, sculptural slab that treats the island as furniture as much as a work surface.
Popular materials for waterfall edges:
- Quartz (most popular—durable, consistent veining)
- Marble (high-end aesthetic, requires sealing)
- Porcelain slab (lighter, large-format tiles)
- Butcher block (warmer, more casual waterfall)
Best for: Contemporary, minimalist, and luxury kitchen styles.
Cost premium: Waterfall edges typically add $500–$2,000 to countertop costs due to extra material and precision mitering.
4. Two-Tiered / Double-Decker Kitchen Islands
A two-tiered island incorporates two counter heights—typically a lower prep surface (36 inches) and a raised bar-height overhang (42–45 inches) for seating. This separation creates a natural visual divide between the cooking zone and the dining zone, and hides prep mess from guests seated at the island.
Best for: Kitchens open to a living or dining room where sight lines matter.
Drawback: Takes up more vertical visual space; can feel heavy in smaller kitchens.
5. Kitchen Islands with Seating
Seating transforms an island from a work surface into a gathering place. The design considerations here are critical—too shallow an overhang, and stools won’t fit; too low a counter, and standard stools hit the underside.
Seating Height Guidelines
| Counter Height | Recommended Stool Height | Overhang Needed |
|---|---|---|
| Standard (36″) | 24–26″ counter stool | 12–15″ |
| Bar height (42″) | 28–30″ bar stool | 12–15″ |
| Pub height (45″) | 30–32″ bar stool | 12–15″ |
Seating Styles to Consider
- Backless stools: Space-saving, tuck fully under the island when not in use
- Low-back stools: Comfortable for longer sitting without blocking sight lines
- High-back bar stools: More supportive; works best at larger islands with room to spare
- Upholstered seats: Leather, velvet, or performance fabric for comfort and texture
- Built-in bench seating: Attached to one end of the island; ideal for family kitchens
- Swivel stools: Practical for busy households where people frequently get up and down
How many seats can your island fit? Allow 24 inches of linear counter space per seat. A 6-foot island (72″) can seat three comfortably.
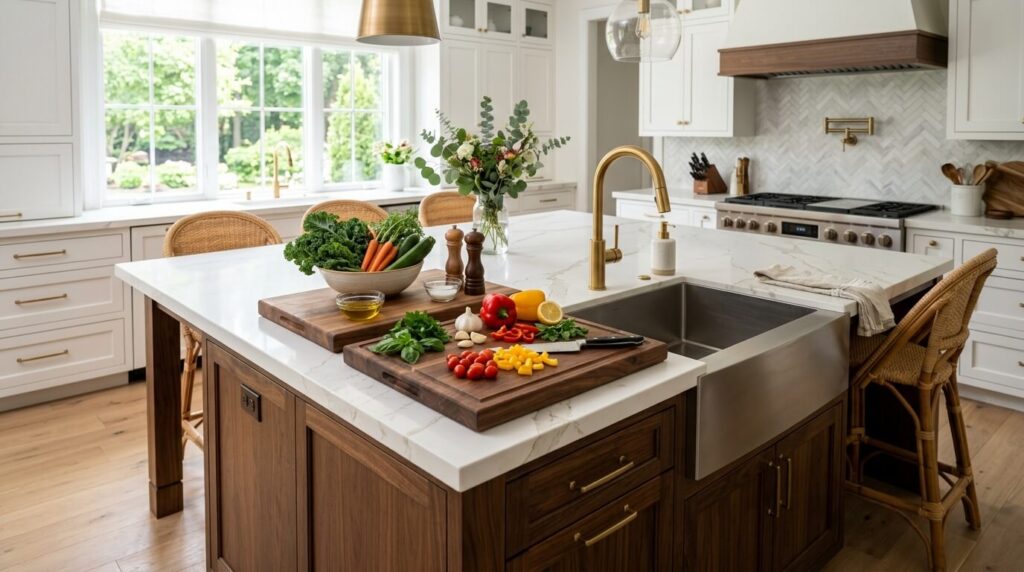
6. Kitchen Islands with Sink
A prep sink or secondary sink on the island is one of the most functional upgrades possible. It creates an independent prep zone so two cooks can work simultaneously without crossing paths.
Sink options for islands:
- Single-bowl undermount: The most popular; clean look, easy cleaning
- Prep/bar sink: Small (15–18″), ideal for rinsing produce and filling pots
- Farmhouse/apron-front: Makes a statement; best on larger islands
- Trough sink: Long rectangular basin; great for entertaining-focused kitchens
Plumbing consideration: Adding a sink to an island requires running supply and drain lines under the floor—a significant but standard part of any kitchen remodel. Budget $1,500–$4,000 for plumbing alone depending on distance from existing lines.
7. Kitchen Islands with Cooktop or Range
Placing a cooktop on the island is a premium design choice that repositions the cook to face the room rather than the wall—ideal for open-plan living where you want to stay connected to guests.
Key requirements:
- Ventilation: A ceiling-mounted range hood directly above is non-negotiable for gas; required for induction/electric as well for air quality
- Clearance: Hood should hang 30–36 inches above the cooktop surface
- Safety: Adequate clearance from seating on the opposite end (at least 24 inches between cooktop edge and any seated guest)
Cooktop types suited to islands:
- Induction cooktops (safest for islands with nearby seating—no open flame, cooler surface)
- Gas cooktops (preferred by serious cooks; requires gas line)
- Electric smooth-top (affordable; slower temperature response)

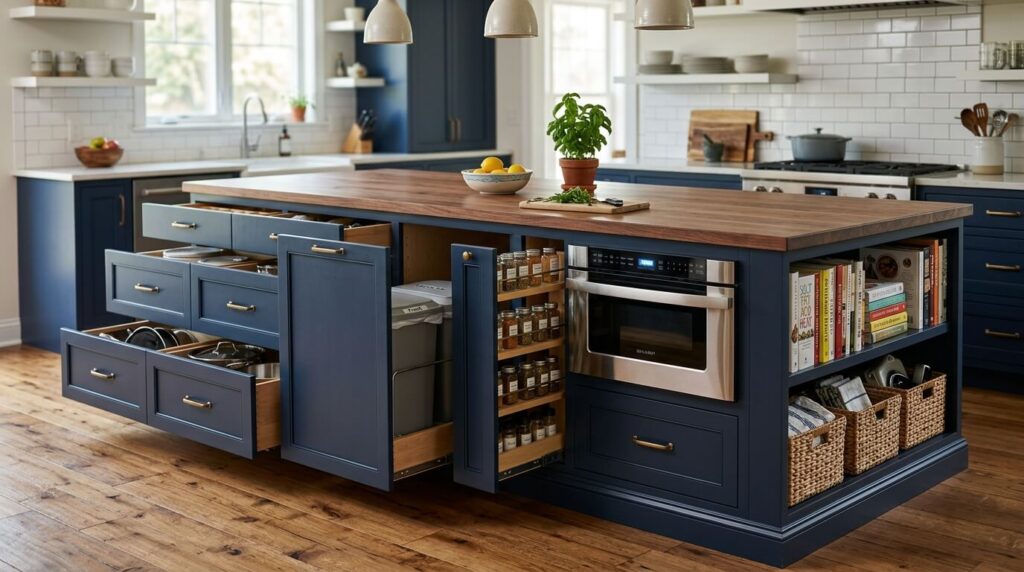
8. Kitchen Islands with Built-In Storage
Smart storage is arguably the island’s highest-value feature. The best island storage designs treat every cubic inch intentionally.
Storage ideas to consider:
- Deep drawers (instead of doors): Drawers are more accessible than cabinet doors; base drawers can house pots, pans, baking sheets, and small appliances
- Pull-out trash and recycling: Keeps waste contained and off the floor
- Spice drawers: Shallow, angled inserts inside a drawer keep spices visible and accessible
- Charging drawer: A drawer with a built-in USB hub and outlet for phones and tablets
- Wine rack or beverage center: An undercounter wine fridge or pull-out wine rack works beautifully in the island’s end panel
- Open shelving: One or two open shelves on the island’s back or end panel for cookbooks, baskets, or décor
- Microwave drawer: A pull-out microwave hidden below the countertop frees up wall space
9. Custom Shaped Kitchen Islands
Not all islands are rectangles. The shape should reflect your kitchen’s floor plan and circulation needs.
Common island shapes:
| Shape | Best Kitchen Size | Key Benefit |
|---|---|---|
| Rectangle | Most kitchens | Maximizes counter and storage |
| L-shaped | Large, open kitchens | Creates zones; fits corner spaces |
| T-shaped | Very large kitchens | Dedicated seating wing |
| U-shaped | Professional/large kitchens | Multiple zones; requires significant space |
| Curved/oval | Contemporary designs | Softens hard lines; improves traffic flow |
| Hexagonal | Showpiece kitchens | Unique focal point |
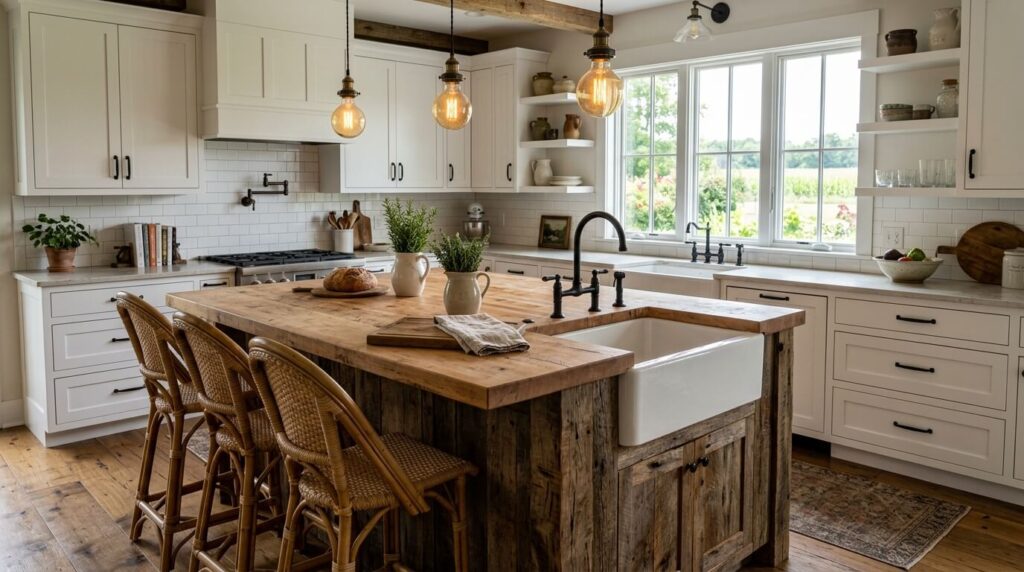
10. Rustic and Farmhouse Kitchen Island Designs
The farmhouse island aesthetic draws on raw, natural materials: reclaimed wood, shiplap panels, apron-front sinks, and vintage-style hardware. It pairs especially well with white or cream perimeter cabinets, subway tile backsplashes, and open shelving.
Design elements:
- Butcher block or honed slab countertop
- Painted or distressed wood base (navy, sage, or white are classic)
- Apron-front sink
- Pendant lighting with Edison bulbs or wire cages
- Wicker or cross-back bar stools
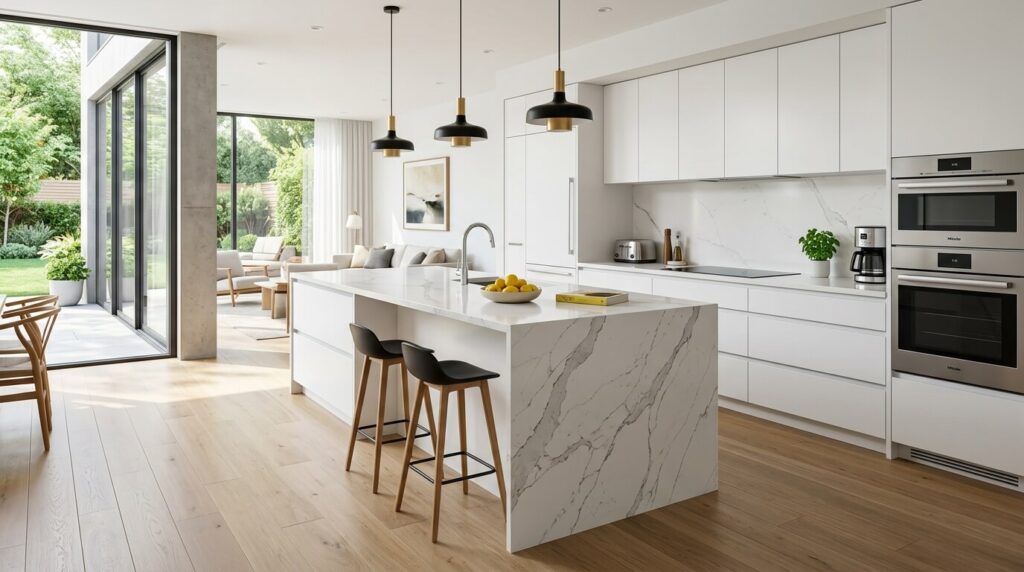
11. Modern and Minimalist Kitchen Island Designs
A modern minimalist island favors flat-panel cabinet fronts, handleless push-to-open drawers, monochromatic palettes, and seamless transitions between countertop and cabinetry. Waterfall edges are common.
Design elements:
- Handle-free drawer and cabinet fronts (push latch or integrated pull grooves)
- Quartz or porcelain countertop in white, off-white, or light grey
- Matching island and perimeter cabinet color or contrasting island color
- Recessed lighting or slim pendant bars rather than decorative pendants
- Hidden electrical outlets flush-mounted in the counter edge
12. Two-Tone Kitchen Island Designs
One of the biggest kitchen design trends of the past several years—and still going strong in 2026—is the contrasting island. The perimeter cabinets are one color (often white or light grey), while the island stands out in a deeper hue: navy, forest green, charcoal, black, terracotta, or sage.
This approach makes the island feel like a piece of furniture rather than a built-in, adding visual warmth and depth without overwhelming the space.
Popular two-tone combinations:
- White perimeter + navy island
- White perimeter + forest green island
- Grey perimeter + black island
- Cream perimeter + warm brown/walnut island
Kitchen Island Sizes: How Big Should Your Island Be?
Minimum Kitchen Size for an Island
The minimum kitchen size to accommodate an island is approximately 100 square feet, with a floor plan large enough to maintain 36 inches of clearance on all sides (42–48 inches is preferred for two cooks or heavy traffic).
Standard Island Dimensions
| Dimension | Standard Range | Notes |
|---|---|---|
| Length | 4–10 feet | 6–7 feet is most common |
| Width | 2–4 feet | 3 feet (36″) minimum for prep use |
| Height | 36 inches | Standard counter; 42″ for bar seating |
| Clearance (each side) | 36–48 inches | 42–48″ preferred for two-cook households |
Small Kitchen Islands
If your kitchen is under 150 square feet, consider:
- A rolling cart island (24″ × 36″) that can be pushed aside
- A narrow island (24″ wide, 48–60″ long) focused on storage rather than seating
- A peninsula instead of a true island, using one wall for attachment to gain counter and storage without requiring full four-sided clearance
Kitchen Island Countertop Materials: Comparison
| Material | Durability | Maintenance | Cost/sq ft | Best For |
|---|---|---|---|---|
| Quartz | Excellent | Low (non-porous) | $60–$150 | Most kitchens |
| Granite | Excellent | Medium (needs sealing) | $50–$130 | Natural stone lovers |
| Marble | Good | High (porous, stains) | $75–$200 | Luxury/aesthetic focus |
| Butcher Block | Good | Medium (oil regularly) | $30–$70 | Farmhouse, prep-focused |
| Concrete | Good | High (seal frequently) | $70–$150 | Industrial/custom designs |
| Porcelain Slab | Excellent | Low | $60–$120 | Waterfall, modern look |
| Stainless Steel | Excellent | Low (shows scratches) | $80–$150 | Professional/industrial |
| Laminate | Fair | Low | $15–$40 | Budget kitchens |
Which Countertop Material Is Best for a Kitchen Island?
Quartz is the most practical choice for most homeowners. It is non-porous (no sealing required), highly resistant to stains and scratches, available in hundreds of colors and patterns including realistic marble-look options, and competitively priced. It is the countertop material specified in the majority of professional kitchen designs for island surfaces that see heavy daily use.
Butcher block is an excellent choice for a dedicated prep zone when used on a portion of the island or as a secondary surface, offering a naturally antibacterial cutting surface when properly maintained.
Kitchen Island Base and Cabinet Materials
The island base is made up of cabinet boxes (the structural carcass) and door/drawer fronts. Common options:
- Solid wood: Highest quality; expands with humidity; used in custom cabinetry
- Plywood carcass with hardwood or MDF fronts: Standard in semi-custom and custom cabinetry; strong and stable
- MDF fronts: Smooth, paint-ready, budget-friendly; prone to moisture damage if not properly sealed
- Thermoplastic/PVC fronts: Extremely durable, moisture-resistant; common in European-style cabinetry
Lighting for Kitchen Islands
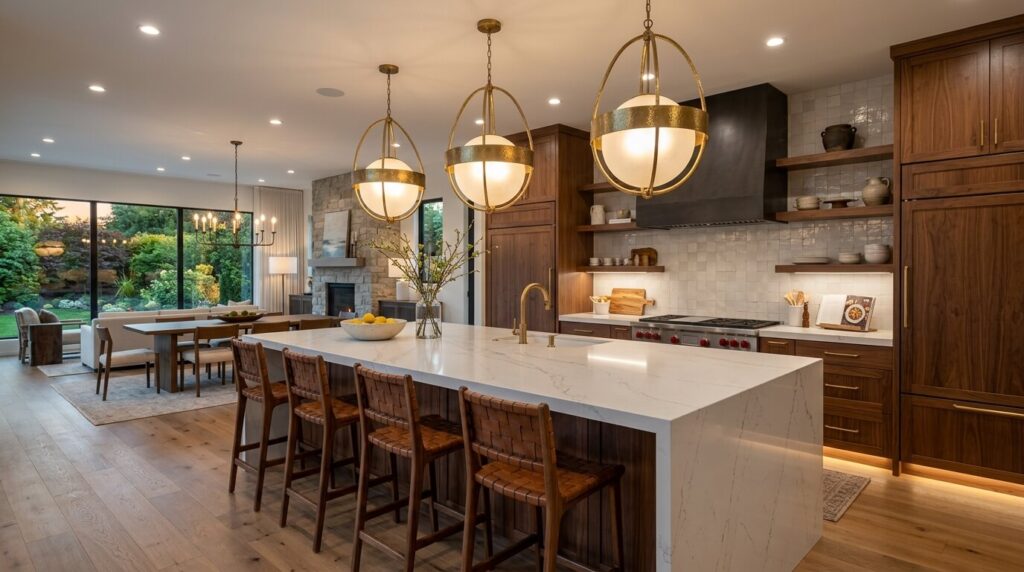
Lighting above the island accomplishes two things: it illuminates the work surface and it anchors the island visually within the room.
Pendant Lights
The most popular choice. Guidelines:
- Hang pendants 30–36 inches above the countertop (lower for standard heights)
- Space multiple pendants 24–30 inches apart
- Size pendants proportionally: one large pendant for short islands; two or three for longer islands
- Choose a pendant scale that doesn’t compete with hood ventilation above a cooktop
Pendant styles by kitchen design:
- Industrial: Black metal cage, Edison bulb
- Farmhouse: Rattan, woven, or schoolhouse-style
- Modern: Geometric, matte black, brushed brass
- Transitional: Simple drum shades in linen or glass
Recessed Lighting
Recessed cans positioned directly above the island provide clean, even task lighting without requiring overhead clearance for pendants. Best paired with pendant lighting for layered illumination.
Under-Cabinet and In-Island Lighting
LED strip lighting beneath an island overhang creates a floating effect and provides ambient floor-level light—particularly dramatic in modern and contemporary kitchens.
Kitchen Island Flooring Considerations
The floor around and beneath the island is a key design decision, especially in open-plan kitchens.
- Same flooring throughout: Maintains visual continuity; recommended for open-plan homes
- Contrasting material under island: An increasingly popular designer move—a different tile, stone, or wood species beneath the island only, framing it like a rug
- Durable surfaces recommended: Hardwood, LVP (luxury vinyl plank), tile, or natural stone all hold up to kitchen traffic; avoid carpet or soft surfaces in kitchen zones
Kitchen Island Color Trends
Based on current renovation data and designer surveys, the most popular kitchen island colors in 2026 are:
- Deep navy blue – Timeless, pairs beautifully with brass or gold hardware
- Forest/sage green – Warm, earthy, connects to nature-inspired interior trends
- Warm black/charcoal – Dramatic, modern, works in both minimal and traditional kitchens
- Terracotta/clay – Emerging trend; warm, bold, pairs with natural wood and stone
- White or off-white – Perennial classic; crisp and clean
- Warm walnut/natural wood – Wood-toned islands feel like furniture; popular in Scandinavian-influenced design
Kitchen Island Design by Kitchen Style
Traditional Kitchen Islands
Raised-panel cabinet doors, ornate feet, corbels, furniture-style legs, and granite or marble countertops define the traditional island. Hardware is typically brushed nickel or oil-rubbed bronze. Seating is often ladder-back or cushioned bar chairs.
Transitional Kitchen Islands
Shaker-style cabinet doors (the most popular door style in North America), quartz countertops, simple bar pulls, and a two-tone color scheme. This style blends classic and contemporary without fully committing to either extreme.
Contemporary/Modern Kitchen Islands
Flat-panel or handle-free fronts, integrated appliances, waterfall countertops, matte or reflective finishes, and minimal decorative detail. Form follows function.
Coastal/Beach Kitchen Islands
White or pale blue bases, light-toned wood or white quartz countertops, rattan or driftwood-inspired bar stools, open shelving with natural baskets, and simple pendant lighting.
Industrial Kitchen Islands
Raw concrete, reclaimed wood, or black stainless steel countertops; metal-framed cabinet bases or open steel shelving; Edison bulb pendants; pipe-style faucets.
Cost of Kitchen Island Designs
Cost Breakdown: Budget to Luxury
| Type | Estimated Cost | What You Get |
|---|---|---|
| Ready-made freestanding island | $300–$2,500 | Basic storage, no plumbing/electrical |
| IKEA hack / semi-custom | $1,500–$5,000 | Custom size, basic finishes |
| Semi-custom built-in | $5,000–$12,000 | Professional installation, good materials |
| Full custom island (no appliances) | $10,000–$25,000 | Premium materials, custom design |
| High-end with cooktop + sink | $20,000–$50,000+ | Luxury finishes, full plumbing/electrical |
Factors That Affect Kitchen Island Cost
- Size: Larger islands require more material and labor
- Countertop material: Quartz, marble, and stone add significant cost
- Plumbing: Adding a sink or dishwasher drawer requires running new lines
- Electrical: Outlets, cooktop circuits, and lighting need permits and licensed work
- Cabinetry type: Stock vs. semi-custom vs. fully custom
- Finishing details: Waterfall edge, specialty hardware, built-in appliances
- Labor market: Costs vary significantly by region (NYC, LA, and SF add 30–60%)
Common Kitchen Island Mistakes (and How to Avoid Them)
1. Not Enough Clearance
The #1 kitchen island mistake is installing an island that leaves less than 36 inches of walking clearance. Interior designers and NKBA guidelines recommend 42–48 inches for primary traffic paths. Always measure your floor plan carefully before committing to a size.
2. Wrong Counter Overhang for Seating
An overhang of less than 10–12 inches doesn’t allow knees to fit under the counter. Standard recommendation: 12–15 inches for standard-height seating, 12 inches minimum for bar height.
3. Mismatched Scale
A small island in a large kitchen looks lost; an oversized island in a small kitchen feels oppressive. The island should occupy roughly 10–15% of the kitchen’s total square footage.
4. Poor Lighting Plan
Adding an island without adding dedicated overhead lighting means relying on ambient room lighting, which creates shadows on your prep surface. Always include task lighting directly above.
5. Ignoring the Work Triangle
If adding a cooktop or sink to the island, recheck your kitchen work triangle (refrigerator—sink—cooktop). The total distance between these three points should be 13–26 feet for efficient workflow.
6. Forgetting Electrical Outlets
Islands used for prep, charging, small appliances, or cooking need accessible outlets. The NEC now requires at least one outlet on islands over 12 inches wide. Practical designs include 2–3 outlets, ideally pop-up or flush-mounted to preserve aesthetics.
Kitchen Island Installation: Process and Timeline
Step 1: Design and Planning (2–6 weeks)
Work with a kitchen designer or contractor to finalize dimensions, materials, and any plumbing or electrical requirements. Pull permits if needed.
Step 2: Order Cabinetry and Countertop (4–12 weeks)
Semi-custom cabinets typically take 4–8 weeks; fully custom can be 8–14 weeks. Countertops are templated after cabinets are installed and fabricated within 1–2 weeks.
Step 3: Rough-In Plumbing and Electrical (1–3 days)
If adding a sink or cooktop, licensed plumbers and electricians run lines before cabinets are set. This requires floor or ceiling access and typically must be inspected.
Step 4: Cabinet Installation (1–2 days)
Cabinets are set, leveled, and secured. Island base is anchored to the floor.
Step 5: Countertop Templating and Installation (1–2 weeks after cabinets)
Fabricator templates the installed base, then returns to install the slab.
Step 6: Fixtures, Hardware, and Finishing (1–2 days)
Sink, faucet, lighting, and hardware are installed. Electrical outlets are finalized.
Total timeline: Most kitchen island remodels take 8–16 weeks from design to completion. A simpler freestanding island can be installed in a single day.
Kitchen Island Maintenance Guide
Quartz Countertops
- Clean with mild dish soap and warm water; avoid harsh chemicals
- No sealing required
- Avoid prolonged exposure to direct heat (use trivets)
Marble Countertops
- Seal twice annually
- Wipe up acidic spills (citrus, wine, vinegar) immediately
- Use cutting boards—marble scratches more easily than quartz
Butcher Block
- Oil monthly with food-safe mineral oil to prevent drying and cracking
- Sand and re-oil if surface becomes rough or stained
- Avoid prolonged standing water
Painted Wood Island Base
- Wipe down regularly to prevent grease buildup
- Touch up chips with matching paint to prevent moisture penetration
- Clean hardware with appropriate metal-safe cleaner
Stainless Steel
- Wipe in the direction of the grain to avoid scratching
- Use a dedicated stainless cleaner to maintain finish
- Avoid steel wool
Kitchen Island Accessibility and Safety Considerations
- ADA-friendly islands: Lower one section of the island to 34 inches (ADA counter height) to accommodate wheelchair users or children
- Rounded corners: Specify radius corners on island edges to reduce injury risk, especially in households with young children
- Anti-tip anchoring: Freestanding islands should be anchored to the floor or wall if housing heavy appliances
- Cooktop safety: If a cooktop is on the island, keep seating on the far end with at least 24 inches between the cooking surface and seated guests
- Non-slip flooring: Choose floor materials with appropriate slip resistance (especially if the island houses a sink)
Comparison Table: Kitchen Island Design Styles
| Style | Cabinet Fronts | Countertop | Hardware | Seating | Lighting |
|---|---|---|---|---|---|
| Traditional | Raised panel | Granite/marble | Brushed nickel/bronze | Cushioned bar chairs | Lantern pendants |
| Farmhouse | Shaker, painted | Butcher block/marble | Black iron | Cross-back or rattan stools | Edison bulb pendants |
| Modern/Minimalist | Flat panel, handle-free | Quartz, porcelain | None or integrated | Backless metal stools | Linear LED bars |
| Transitional | Shaker | Quartz | Simple bar pulls | Low-back upholstered | Drum shades |
| Coastal | Shaker, white/light | White quartz | Brushed nickel | Rattan/natural fiber | Woven pendants |
| Industrial | Open frame/metal | Concrete/steel | Black pipe-style | Metal saddle stools | Cage/Edison pendants |
| Luxury/Contemporary | Custom, lacquer | Marble waterfall | Matte brass/gold | Leather bar stools | Statement sculptural |
Expert Tips for Planning a Kitchen Island
- Walk your kitchen before you design. Live in the space for a few weeks and note where bottlenecks occur—that informs clearance decisions better than any rule of thumb.
- Think in zones. A well-designed island has a prep zone, a storage zone, and a social zone. Assign each before you finalize dimensions.
- Match or contrast intentionally. Two-tone islands work because the contrast is deliberate and coordinated. Avoid accidental mismatches from sourcing cabinets and countertops from different manufacturers.
- Invest in the countertop. Of all island elements, the countertop has the most visual and tactile impact. It’s not the place to cut corners.
- Design your lighting with the island, not after. Pendant placement requires ceiling junction boxes positioned before drywall is closed. Adding them after is expensive.
- Consider resale value. An island with plumbing or a cooktop adds measurable value in most markets. A well-executed island remodel typically recovers 60–80% of cost at resale.
- Get a second quote. Kitchen island costs vary wildly. Two to three contractor quotes will give you an accurate market rate for your area.
Frequently Asked Questions
1. What is the minimum kitchen size needed for an island?
Most designers recommend a minimum kitchen floor area of 100 square feet, with at least 36 inches of clearance on all walkable sides of the island. In practice, kitchens under 150 square feet often work better with a peninsula or rolling cart.
2. How much does it cost to add an island to a kitchen?
Costs range from $300 for a basic freestanding unit to $50,000+ for a fully custom island with integrated cooktop, sink, and luxury materials. A typical semi-custom built-in island without plumbing runs $5,000–$12,000 including labor.
3. How wide should a kitchen island be for seating?
The island needs a minimum 12-inch knee overhang for seating. The base should be at least 24 inches deep, giving a total island width of at least 36–42 inches when seating is included on one side.
4. What is the best countertop material for a kitchen island?
Quartz is the most practical choice for most homeowners—non-porous, low-maintenance, durable, and available in many styles. Marble offers the best aesthetics but requires regular sealing and careful use. Butcher block is excellent for dedicated prep surfaces.
5. Should a kitchen island match the cabinets?
Not necessarily. A contrasting island color is currently one of the most popular kitchen design choices and often elevates the space. What matters is that the island’s color and material palette is intentionally coordinated with the rest of the kitchen—not that it matches exactly.
6. How many pendant lights do I need over a kitchen island?
As a general rule, one pendant per 2 feet of island length. A 6-foot island typically needs two to three pendants. Space them evenly and hang them 30–36 inches above the countertop.
7. Can you put a cooktop in a kitchen island?
Yes, and it’s a popular design choice in open-plan kitchens. It requires overhead ventilation (a ceiling-mounted range hood), appropriate electrical or gas connections, and adequate clearance between the cooktop and any seating on the island.
8. What size island do I need to seat four people?
Allow 24 inches of linear counter space per seat. To seat four people, you need at least 96 inches (8 feet) of seating-side counter length, or you can seat two on each of two sides.
9. Is a kitchen island worth the investment?
For most homeowners, yes. An island adds counter space, storage, and seating—the three most commonly cited kitchen priorities in remodel surveys. It also adds measurable resale value, particularly when it includes a sink or seating area.
10. What’s the difference between a kitchen island and a peninsula?
An island is freestanding with open clearance on all four sides. A peninsula is attached to a wall or cabinet run on one end, essentially an extension of the existing counter. Peninsulas work well in smaller kitchens where a full island wouldn’t fit.
11. Do you need a permit to add a kitchen island?
A freestanding island requires no permit. A built-in island with electrical outlets, a sink, or a cooktop does require permits for plumbing and electrical work in most jurisdictions.
12. How do I choose the right island size for my kitchen?
Measure your available floor space, subtract 42–48 inches from each side for clearance, and the remaining central space is your maximum island footprint. A kitchen designer or contractor can help you optimize for your specific floor plan.
13. What kind of seating works best for a kitchen island?
Backless counter stools are the most practical—they tuck fully under the overhang, take up no visual space, and are easy to clean. If comfort is a priority, low-back stools with a small footrest rail are excellent. Match stool finish to island or kitchen hardware for a cohesive look.
14. How do I make a small kitchen island feel bigger?
Use light countertop colors to reflect light; choose open-base or furniture-leg island styles to reveal floor space; avoid overhead clutter (minimal pendants or recessed lighting); and keep the island clear of excessive decor.
15. What island features have the best return on investment?
According to kitchen remodeling data, the highest-ROI island features are: seating capability, integrated storage, a prep sink, and a contrasting or statement countertop. A cooktop adds significant value in markets where buyers prioritize cooking.
